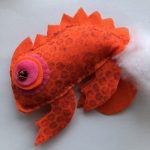
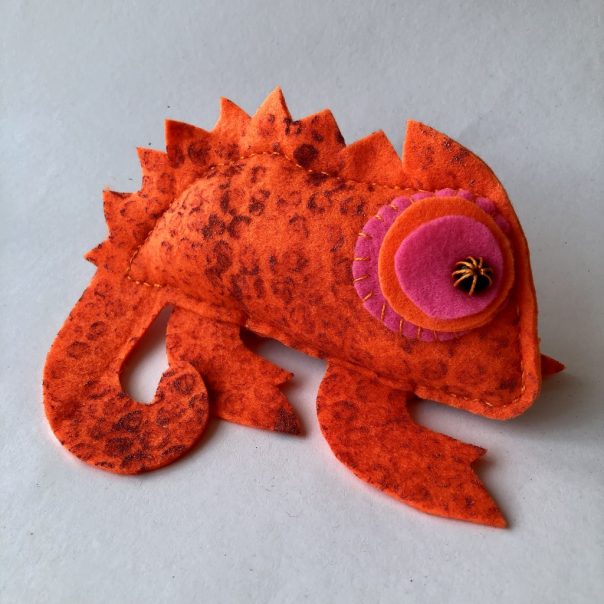
Make your very own little chameleon pal for Sew a Softie 2021!
Introducing Ketchup the Chameleon: our project for Sew a Softie month 2021.
This is our 5th year in joining Trixi for her wonderful sewing tutorial hop.
We love taking part in Sew a Softie month in July and we LOVE that the super Trixi (Sew a Softie’s founder all round sewing guru) has gathered up some of her creative friends to bring you LOTS of simple sewing projects for stitchers of all ages and abilities.
This little cutie is based on our Cardboard Chameleon project and uses pretty much the same template with just a few tweaks to make her into a cuddly reptile.
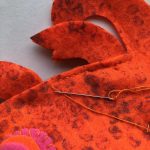
We also added some texture and pattern to our chameleon softie’s skin with some bubblewrap printing which works really well on the felt.
Download the templates here.
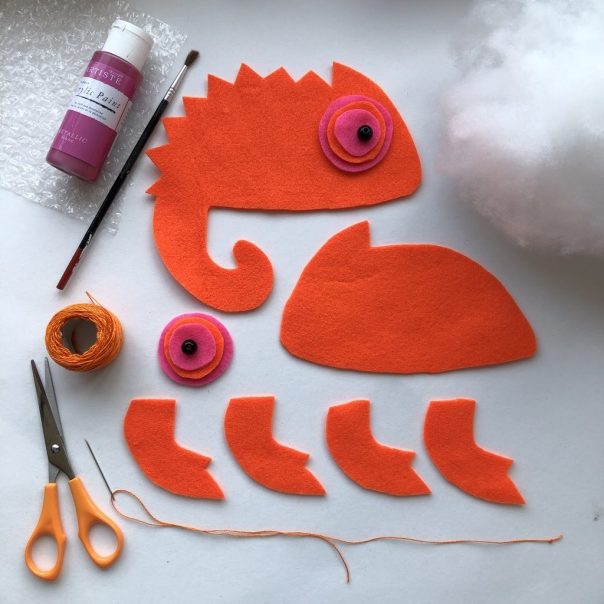
Materials list:
- Felt (approx. 30 x 30cm square) in one colour
- Felt scraps in a contrasting colour
- Acrylic paint (or fabric paint) in a contrasting colour to the felt
- Paintbrush
- Bubblewrap (approx. 30 x 30cm square)
- 2 Black beads
- Stuffing
- Embroidery thread
- Needle
- Scissors
- Pins
What to do:
- Print out the template sheet and cut out the shapes.
- Lay the body and leg template pieces on top of the large piece of felt. Pin and cut out.
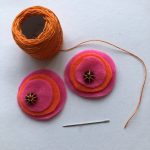
- Lay the larger and the smaller eye circles on a contrasting colour felt scrap. Pin and cut out. Repeat so you have 2 of each size.
- Lay the middle sized eye circle on to the main colour felt. Pin and cut out. Repeat so you have 2 middle sized circles.
- Thread a needle with some embroidery thread and tie a knot in one end.
- Layer the 3 circles – large, medium & small – on top of each other. Sew a bead to the circles through all 3 layers. This is one of the chameleon’s eyes. Repeat with other eye.
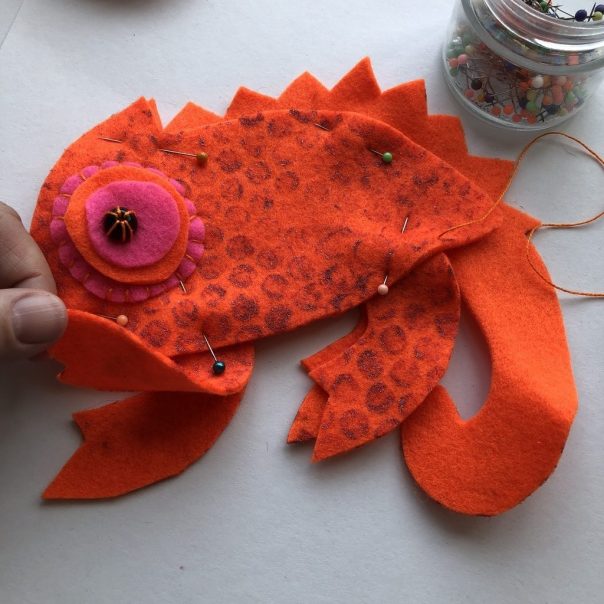
- Lay the body and leg felt pieces on a flat surface, right side up (as show in the photo below), as close together as you can.
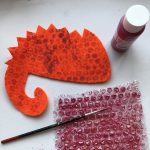
- Lay the bubblewrap on a table with the bubbles facing upwards.
- Using a paintbrush, paint all over the bubbles with acrylic or fabric paint.
- Working quickly so the paint doesn’t dry, lay the painted side down on top of the body and legs shapes.
- Apply a bit of pressure all over the bubblewrap – this presses the painted bubbles onto the surface you’re printing on. Giving it a pat usually does the trick. Just be careful not to pop the bubbles!
- Peel off to reveal the printed pattern. Leave to dry.
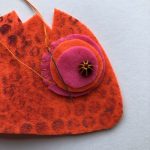
- Thread a needle with embroidery thread and knot an end.
- Sew an eye to one of the body pieces – use whatever stitch you like. We used blanket stitch all around the larger circle at the bottom of the eye so as only to sew through 2 layers of felt. Repeat with the other eye on the other body piece.
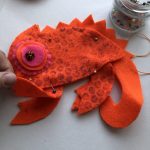
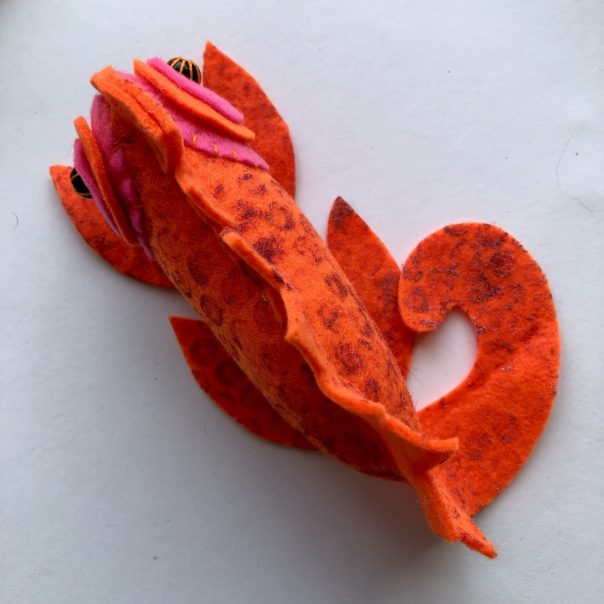
- Lay the body shapes together with the right sides outermost.
- Lay 2 front legs and 2 back legs together with the right sides outermost.
- Sandwich the leg pieces inside the body pieces (as shown in the photograph) and pin all around the edge.
- Thread a needle with embroidery thread and knot an end.
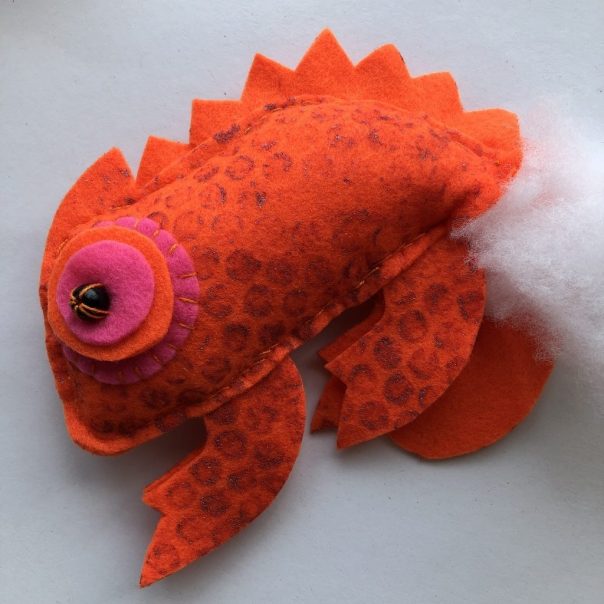
- Starting along the belly sew a running stitch or back stitch all the way around the chameleon body shape – follow the line of the back piece which has no back spikes on it. Leave a 3 or 4cm gap to allow for stuffing.
- Poke stuffing through the gap to fill the body. Once full enough, close up the gap with your running or back stitch. Tie a knot and snip off the excess thread.
- Separate the pairs of legs, front and back and your chameleon should be able to stand up on its own.