Try this magic recipe to make your own 3D cards and pictures.
This is an amazingly tactile activity. Painting is always popular in our house but this art with added magic kept us entertained for a good couple of hours.
1 tablespoon self raising flour
1 tablespoon salt Wilton food colouring
Up to 6 teaspoons water
Mix the dry ingredients in a small cup or bowl.
Add a very small amount of food colouring.
Start by adding 2 teaspoons of water and mix and keep adding teaspoonful by teaspoonful until you have a consistency of thick pouring cream.
These quantities will make enough for one colour, repeat to make a variety of hues.
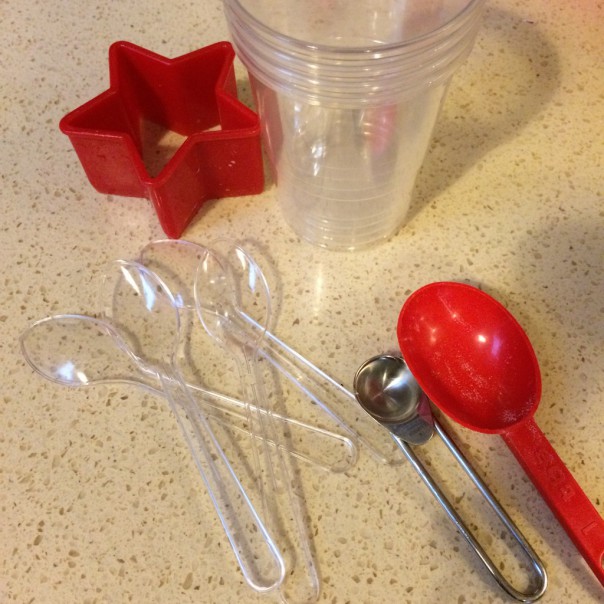
Equipment needed:
Small cups or bowls
Small spoons
Measuring spoons
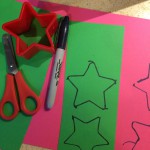
Cookie cutters for templates
Pencil or pen
Thin cardstock or cardboard (standard paper will be a bit too flimsy for this project)
These puffy paint creations won’t last forever, and indeed may not hold up to posting, but will certainly last over the Christmas holidays.
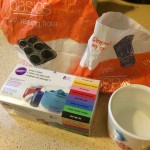
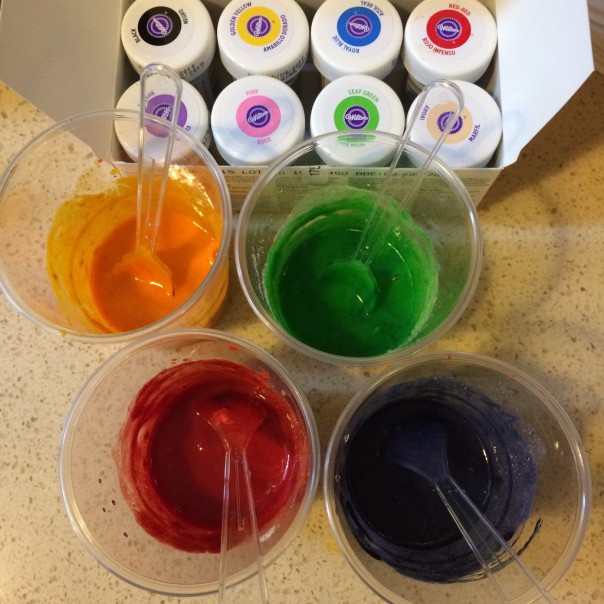
Self raising flour, salt, water and food colouring. I splashed out on some Wilton food colours, they are brilliant, vibrant colours, only a small amount is needed so the pots last a long time.
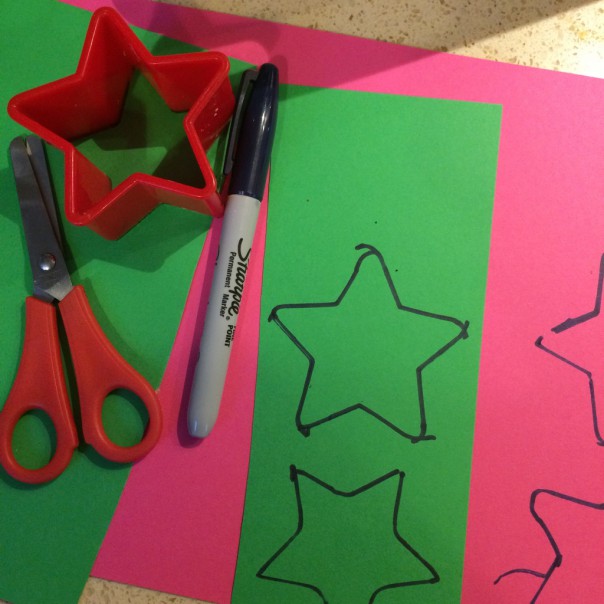
Plastic cups (or you can use bowls), spoons for spreading and painting, measuring spoons, cookie cutter as a shape template.
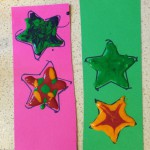
To start with I mixed red, yellow, green and blue.
To make puffy paint ornaments draw around a template (kids can do this).
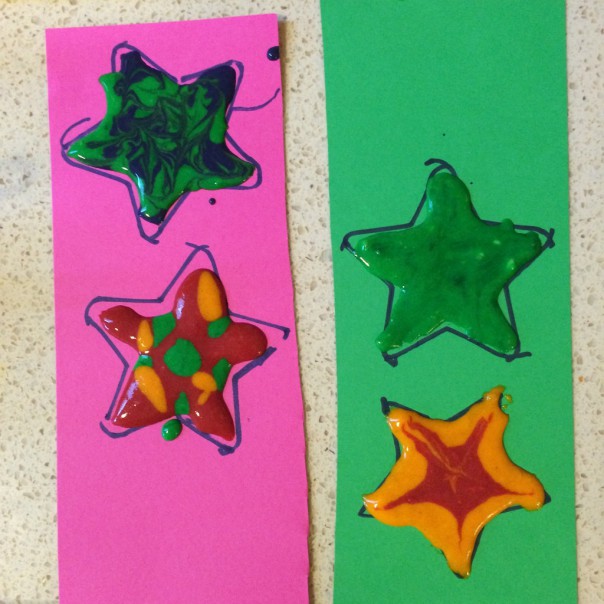
Using spoons to dribble, fill the template shapes with the puffy paint. Use a skewer to drag through and marble two puffy paint colours.
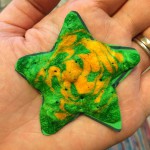
Microwave for 30 seconds on high power and watch the paint transform before your eyes. It’ll be a bit hot straight out of the microwave, but cools quickly. Poke a hole and some ribbon through the puffy paint shape and hang on the Christmas tree.
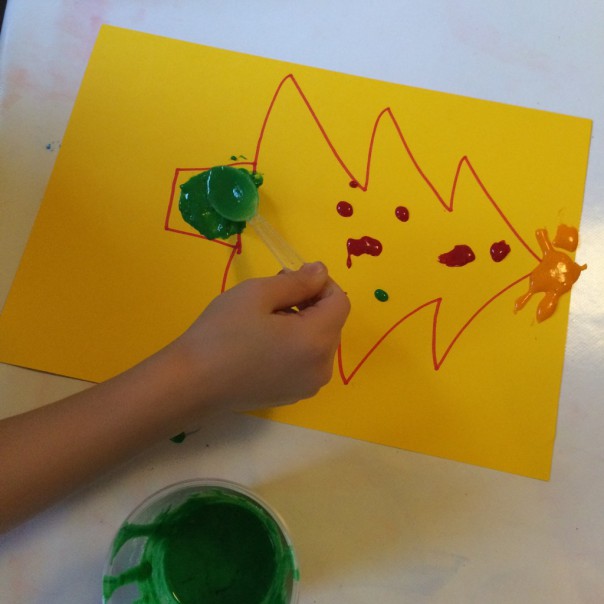
I drew a Christmas tree outline and the boy and girl decorated them with puffy paint ornaments.
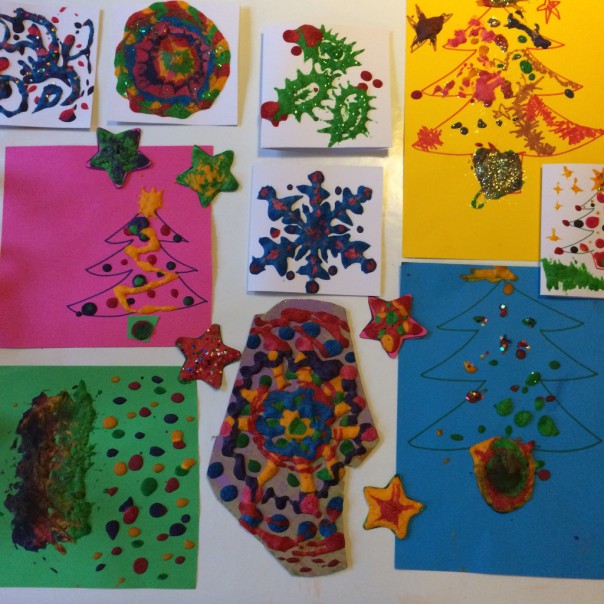
Our puffy paint gallery.
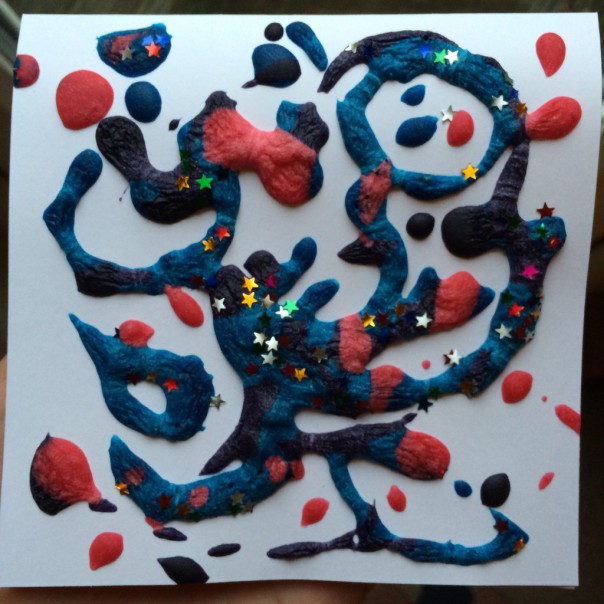
Dribble paint and sprinkle glitter on before microwaving.
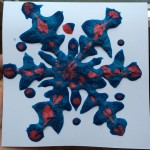
Puffy snowflake. Using a skewer to marble through the paint produced some lovely effects.
Homemade Puffy Paint
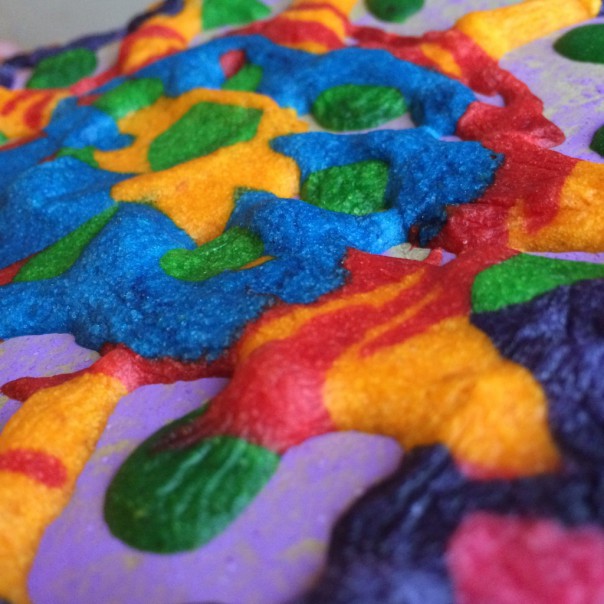
The microwaved puffy paint has such a lovely texture. The boy and girl enjoyed squishing it and poking with the skewer.
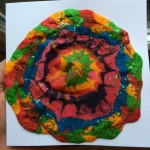
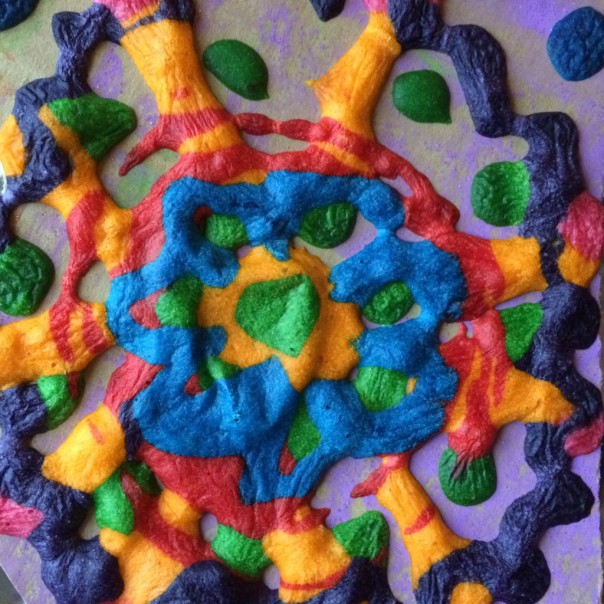
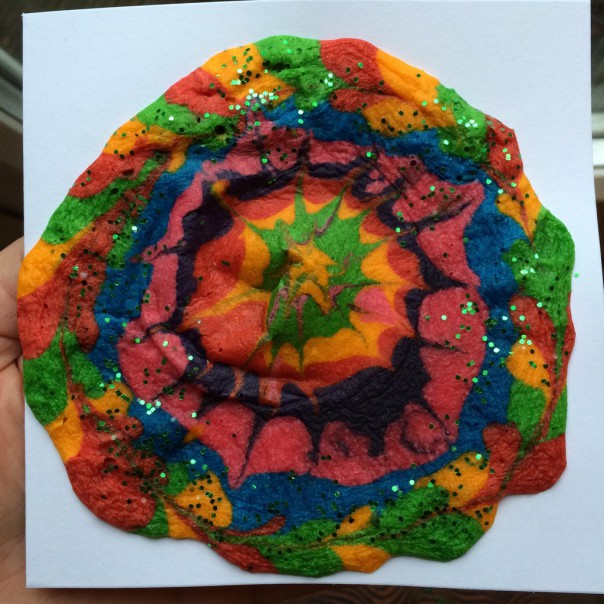
Puffy sunburst.
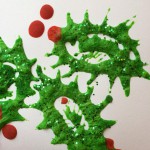
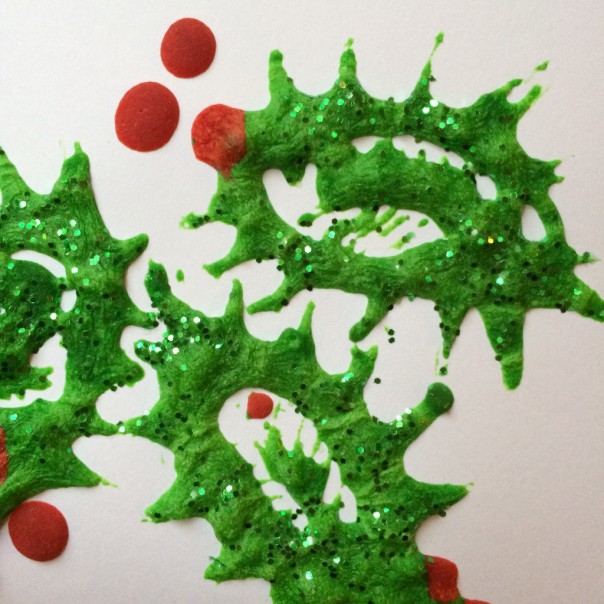
Puffy holly leaves. These would make great Christmas cards.
Self raising flour, salt, water and food colouring. I splashed out on some Wilton food colours, they are brilliant, vibrant colours, only a small amount is needed so the pots last a long time.
Plastic cups (or you can use bowls), spoons for spreading and painting, measuring spoons, cookie cutter as a shape template.
To start with I mixed red, yellow, green and blue.
To make puffy paint ornaments draw around a template (kids can do this).
Using spoons to dribble, fill the template shapes with the puffy paint. Use a skewer to drag through and marble two puffy paint colours.
Microwave for 30 seconds on high power and watch the paint transform before your eyes. It’ll be a bit hot straight out of the microwave, but cools quickly. Poke a hole and some ribbon through the puffy paint shape and hang on the Christmas tree.
I drew a Christmas tree outline and the boy and girl decorated them with puffy paint ornaments.
Our puffy paint gallery.
Dribble paint and sprinkle glitter on before microwaving.
Puffy snowflake. Using a skewer to marble through the paint produced some lovely effects.
Homemade Puffy Paint
The microwaved puffy paint has such a lovely texture. The boy and girl enjoyed squishing it and poking with the skewer.
Puffy sunburst.
Puffy holly leaves. These would make great Christmas cards.